
Chapter 5
Arm, bearings and pivot
The arm is what carries the motor and lets it swing against the spring, so the whole clutch force passes through this joint. It turns on two bearings pressed into the arm and riding on the pivot you put the insert in, back in chapter 2. Nothing here is tight: the joint has to turn with no effort at all.
What you need
Parts
- 1×armprinted, ASA
- 2×F695ZZ bearingF695ZZ flanged, 5 × 13 × 4
- 1×pivot washerprinted, ASA
- 1×M3 screw · pivotM3 × 20, hex socket head (20.0 mm needed under the head)
Tools
- 2.5 mm hex key
- a flat, clean surface to press the bearings against
- a screwdriver, to compress the preload spring
Step 1 Press the two bearings into the arm
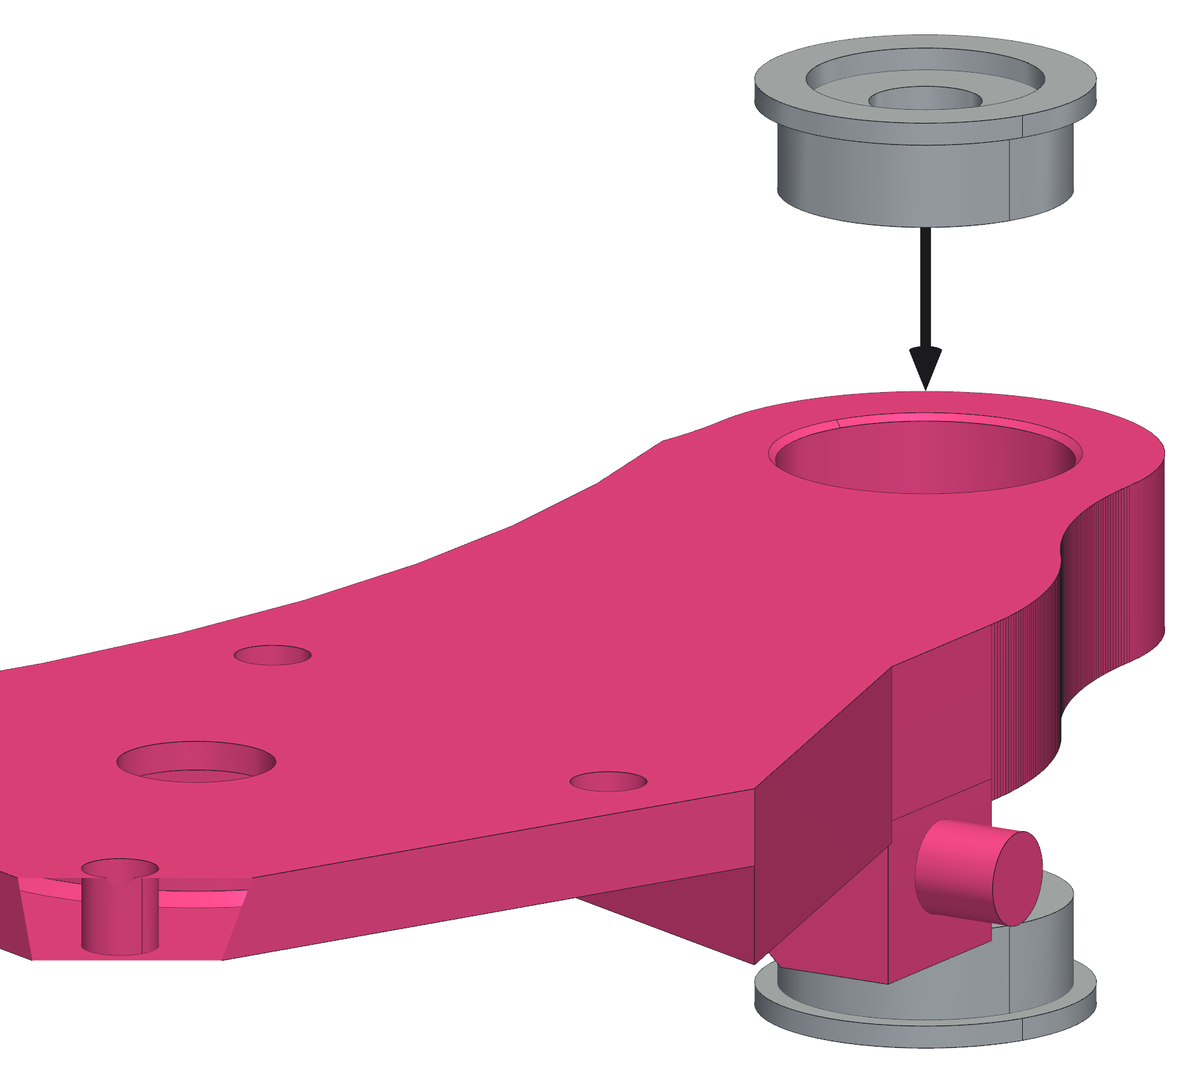
- The seat in the arm goes right through, 8 mm deep, which is exactly two 5 × 13 × 4 mm F695ZZ bearings stacked.
- Put them in flange outwards: one from each face, so the two flanges end up on the outside and the plain faces meet in the middle.
- The seat is drawn Ø13.2 mm so that it prints Ø13. Press by hand, or between two flat jaws - never hammer on the inner ring.
- Press on the outer ring only. A bearing tapped in through its inner ring feels fine and runs rough forever after.
Step 2 Washer and screw on the arm, on the bench
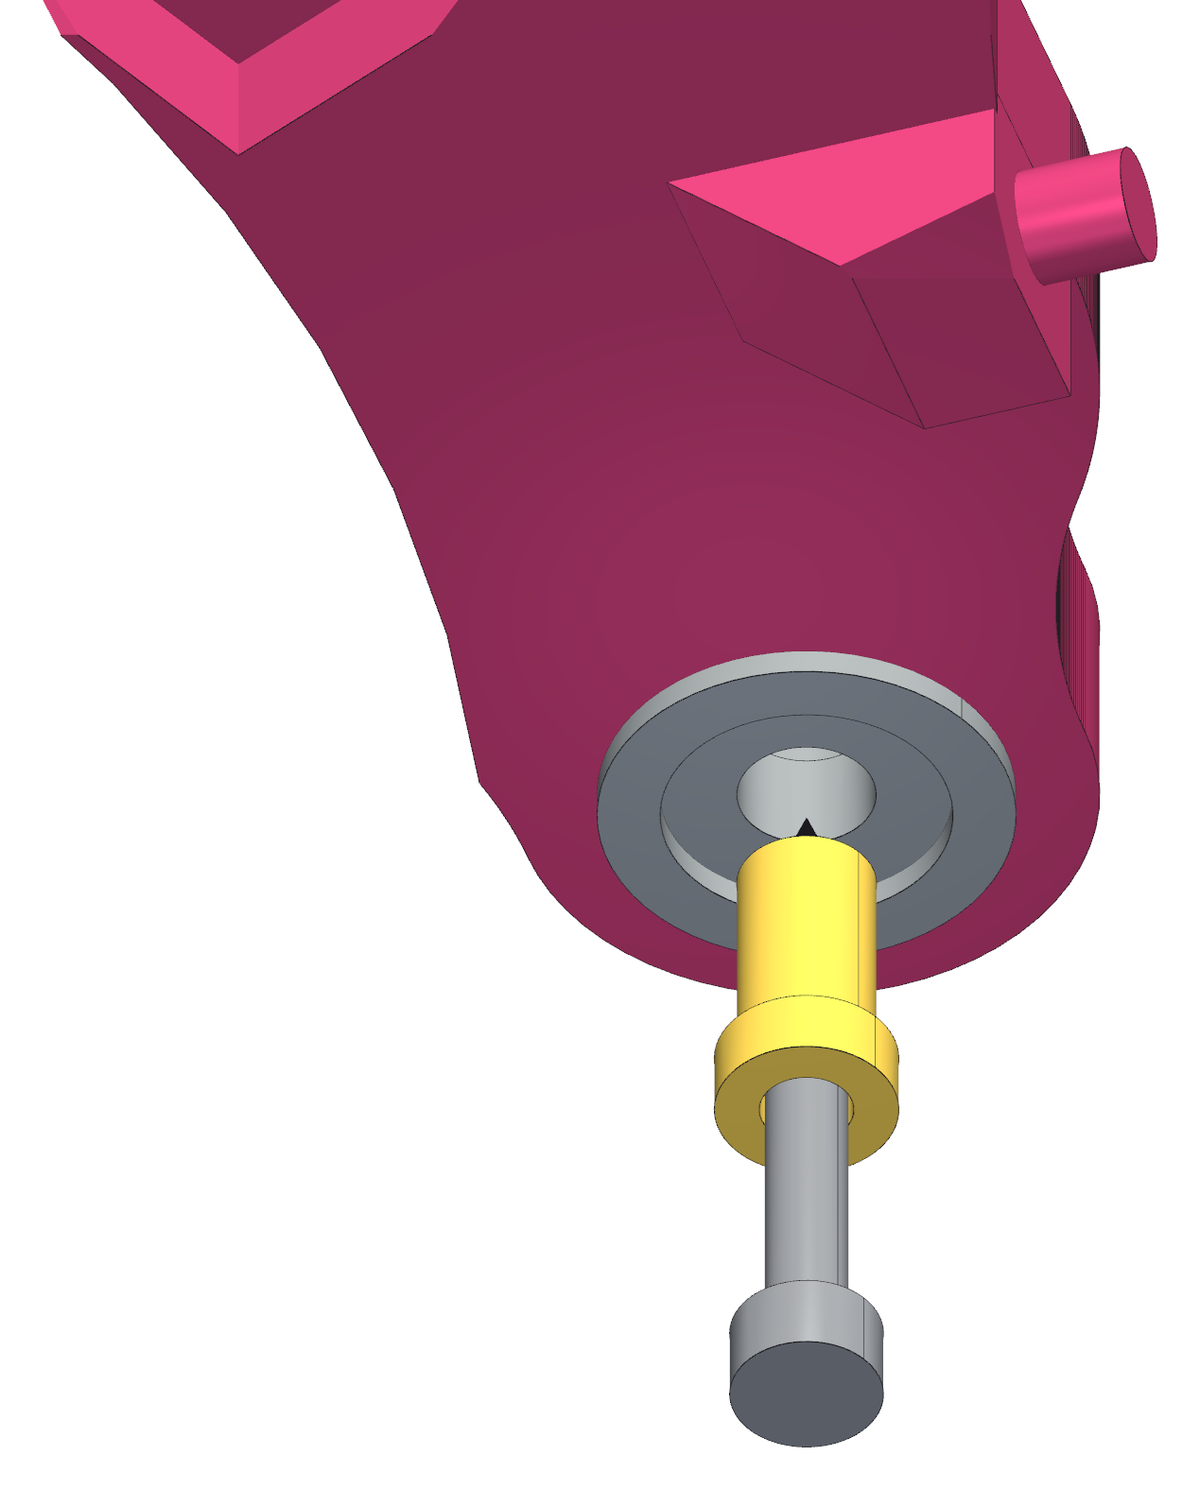
- The printed washer carries the pin: a Ø5 mm bushing 9 mm long. Push it through both bearings from the face with the four motor holes - the camera side - until the washer sits on the inner ring of the near bearing.
- Put the M3 × 20 screw through the washer and the bushing. Hold it back with a finger, so that its tip does not stand out of the bushing: it is driven home once the arm is on the pivot.
Step 3 The arm in through the electronics opening
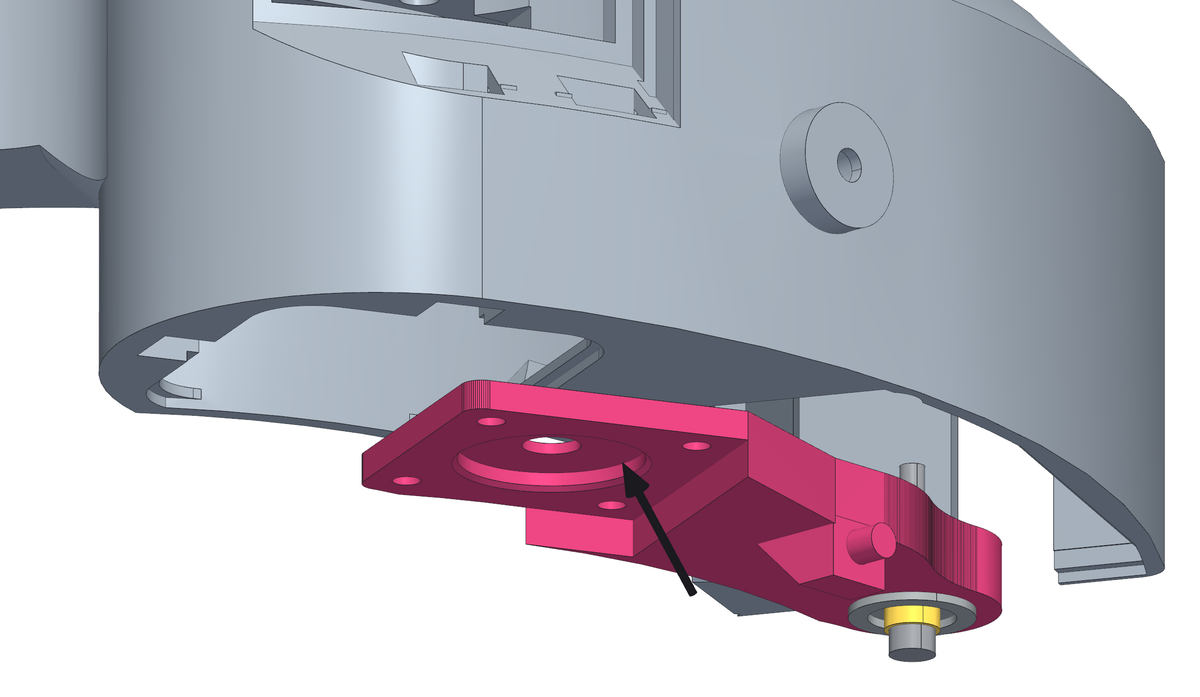
- Turn the part upside down, camera side up. The arm goes in from below, through the large opening in the floor that the board panel will close - the electronics opening - with its washer and screw on, keeping the screw held back.
- It goes in pivot end first, then the motor end follows towards the hatch as the arm comes level: the picture shows where it comes from.
- With the help of a screwdriver, compress the preload spring and slip it into the arm's seat.
- Bring the bushing under the round spot face at the end of the pivot. The arm only goes one way round: the flat face with the four motor holes looks towards the camera side.
Step 4 Drive the screw into the pivot
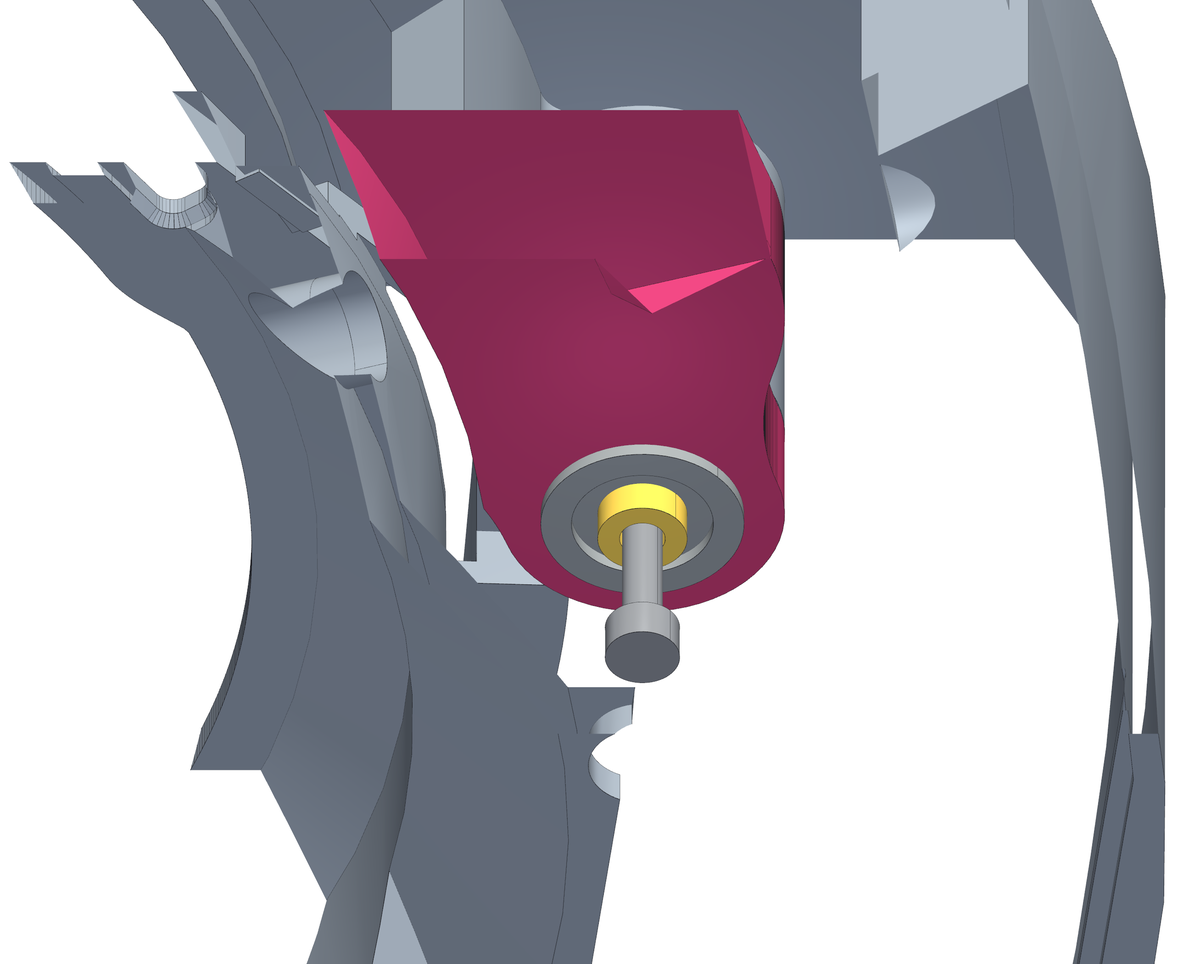
- Drive the M3 × 20 screw through the bushing into the insert at the far end of the pivot, from the camera side.
- The bushing is exactly as long as the bearings plus one flange: the screw pulls it against the collar, not the bearings, so the arm still turns with the screw tight.
- Tighten until the washer is held, no more. Then check: the arm must swing with a fingertip and have no shake at all.
- Above the arm there are 0.3 mm of clearance to the collar, and that gap is what keeps the arm from rubbing as it swings. If the arm binds anywhere in its travel, the screw is too tight or the washer is missing.